This section allows you to view all posts made by this member. Note that you can only see posts made in areas you currently have access to.
Topics - NorthWestern
51
« on: 24 May 2014, 09:21:15 pm »
One of my mirror stems has very bad paint, flaking and faded. The other seems better in that it isn't flaking but it is faded as well. I figured I would strip, sand and paint them but how do you remove the mirror from the stem?
My mirror case has no visible seam or screws and neither does the stem at the top.
Any ideas?
52
« on: 03 May 2014, 08:38:20 am »
A few fazers here today! Will try and get some snaps
53
« on: 12 April 2014, 11:32:47 am »
54
« on: 21 March 2014, 07:23:59 pm »
Tell you what, just watching the motogp fp2 and those ducatis with the matt finish look ace. I think that has sealed the deal, matt vinyl wrap will be attempted...
55
« on: 17 March 2014, 12:19:02 pm »
Ok so, fitted some R1 forks yesterday and I must say the results are superb! Kind of as expected it feels like a different bike and with the BMW S100RR shock it now feels a lot like an overgrown pit bike while still having the all day comfort Fazer riding position  This is just a post with some pics rather than any kind of "how to", I did at one point contemplate doing that but decided against it because a) This is probably not a usual path to fit them, b) As we were rebuilding the forks and oil was on paws etc it was too much hassle to keep wiping hands and operating a camera/phone, c) its been done many times before - this is nothing new... It does however feature a couple of different things so I will put that in here. Basically this is a poor mans way to fit them* This was my shopping list 4XV R1 forks (£100 off eBay). These have polished bottoms which I will be putting back to a satin finish... Seller mentioned one might be leaking so. Pyramid fork seals £9.95 R1 mudguard. New ABS replica from china, £26 delivered. This is awesome! And cheaper than the "slight damage" second hand ones on eBay. No Brainer. R6 2CO yokes £25 off eBay (see below for info) 0.95 fork springs £10 eBay - (These are std Triumph Daytona 675 springs that are .95 linear ones like you pay £85 +P&P from K-Tech for...) * When I say poor man I actually mean someone not spending a whole lot of cash on an Cat C bike I only got to use over winter - but like it more than any other I have owned... And with access to a full race workshop+staff (ie my old man and brother) Before: Here it is, in all its tatty glory. Ex Cat C means nothing is colour matched hence the unintentional two tone mechanically its sound and now sports a BMW S1000RR shock, ally radiator using the same cores as a Pace rad and more! 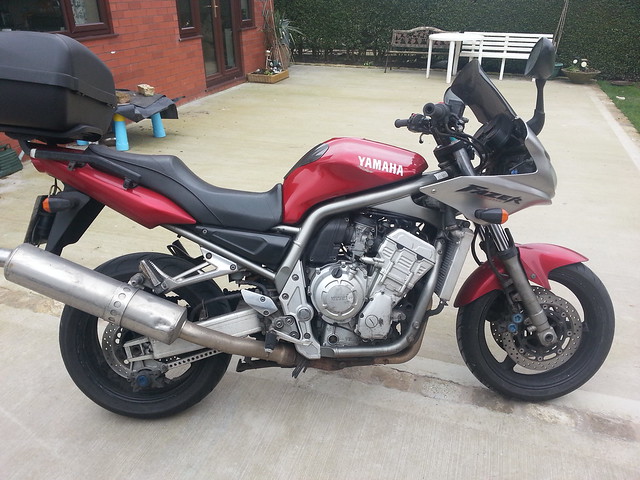 On Plinth: Awaiting the mods - Note the hydraulic press in the background (blue) which has the obligatory Hollywood style cracked pressure guage (obscured by the bikes left mirror...) 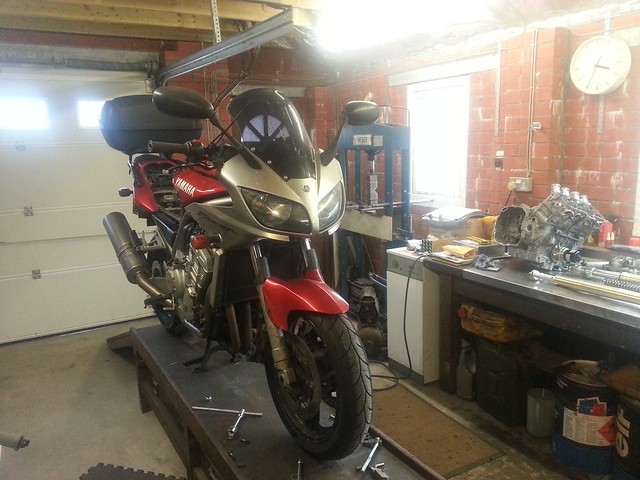 This was moved off the plinth to make way! Yes its small - No I wouldn't want to commute on it.. Yes its trick, Ohlins, Marchecini wheels, alloy tank etc No I can't have the preload adjuster or spare 6" rear dymag  !! 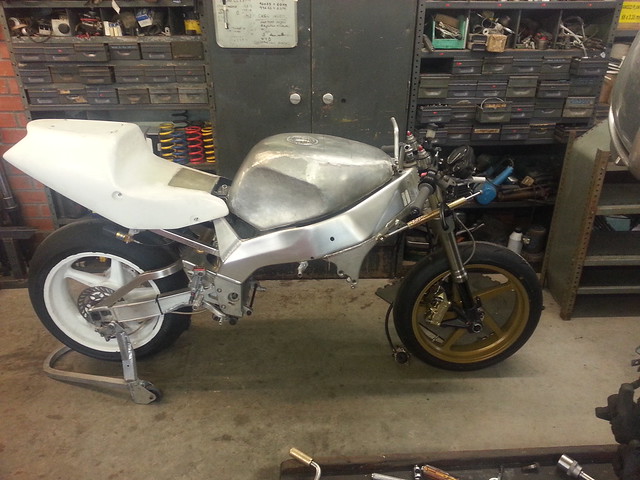 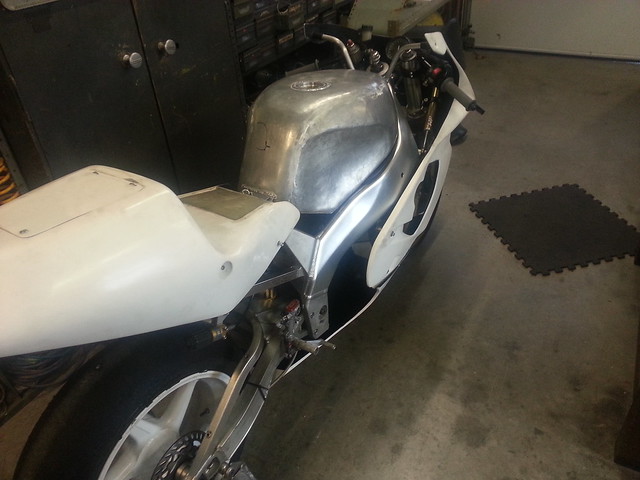 Yokes I saw a set of R6 yokes on eBay off a 2CO R6 that were ending in about 4 mins. A quick google session revealed a bunch of guys claiming to have slipped R1 forks into their R6's. So I bought them, to be fair they were cheap at £25. Turns out that R6 forks are not the same diam as the R1 at the bottom yoke. I couldn't use em so not sure what those forum guys were on about, however the YZF above has its std yokes doing nothing and amazingly have the same offsets as an R6 so I could use the bottom yoke off that - gratis - just needed a 1mm sleeve, easy! The YZF top yoke is odd as it holds the forks higher than the stem bolt which meant that I would have lost a further 12 mm or so if I used that. Instead of making some ally inserts or just welding around the holes we put plates on the underside and welded it up to strengthen the holes for the risers. Here they are just welded, I didn't take any pics once bored out and finished. 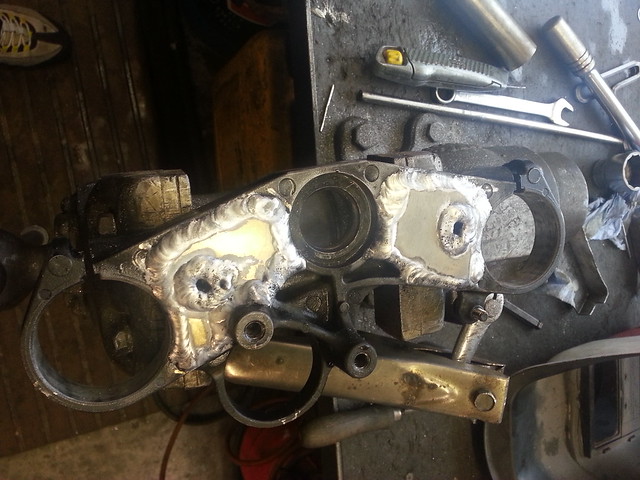 Stem: Bit of a deviation from the traditional R1 fork fitting route: Having seen that people make a spacer to lift the top yoke enabling the nut to clamp it down to the headstock I decided I wanted to machine more threads onto the stem and chop the top off. This means it doesn't need a spacer and the yoke is 12mm lower - this means I can get 12mm of rideheight back which is great. I didn't make longer risers as the slightly lower handlebars feels really good and more comfortable than the near bolt upright std riding position. Forks As mentioned the seller commented that these might have an oil leak so we put new seals in. The seals, Pyramid Parts let us down a bit. I have used them in my crf450 and fireblade with good results but these didn't really fit right, the outside edge was very loose so we put some instant gasket on as a bit of a dodge, if they leak I will have to put some better ones in. Here are the forks after dismantling and measuring for the spacers. 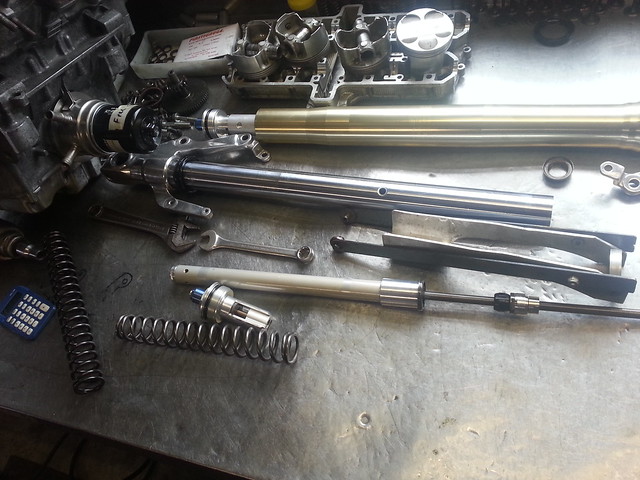 Spacers The std R1 springs are 255mm (even though K-Tech specify 250mm) but the Triumph ones I got are 235 so we made an ally spacer to correct it. 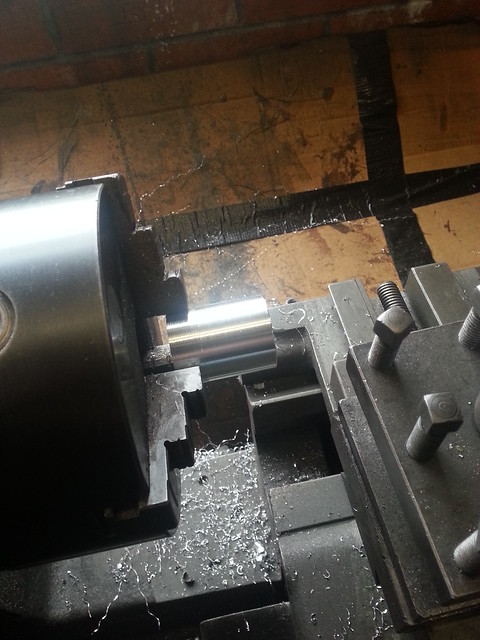 No front, looking needy, you can clearly see the effort I take with cleaning over winter... 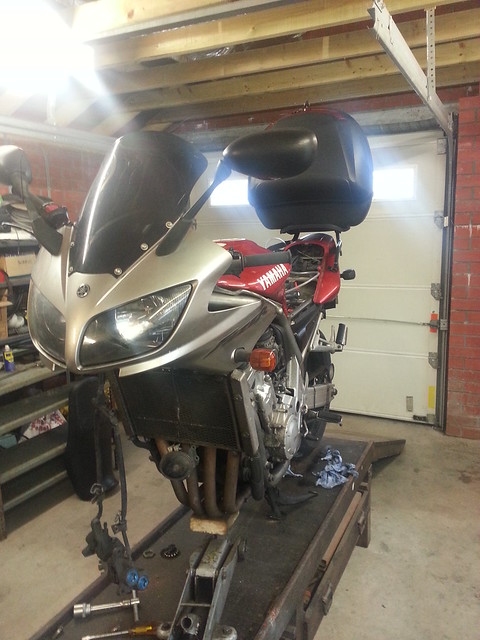 The ignition barrel fit easy enough with some 4mm spacers, the steering lock could operate (but mine requires a 10 min jiggle session to get it off so I don't use it) etc. The risers on the std fazer are mounted in bushes with rubber gaskets, I just bolted mine up straight, metal to metal. I did expect a bit of buzz but in fact they are perfect, no vibes and no bar weights in my Renthals. As I intend to make a carbon fibre mudguard using this as a plug I wrapped it in vinyl to protect it a bit and to see how it looked, looks pretty good really. The carbon one I make will have a fender extender built in rather than a bolt on. Finished! Couldn't be happier with it! Its like getting a new bike, again! 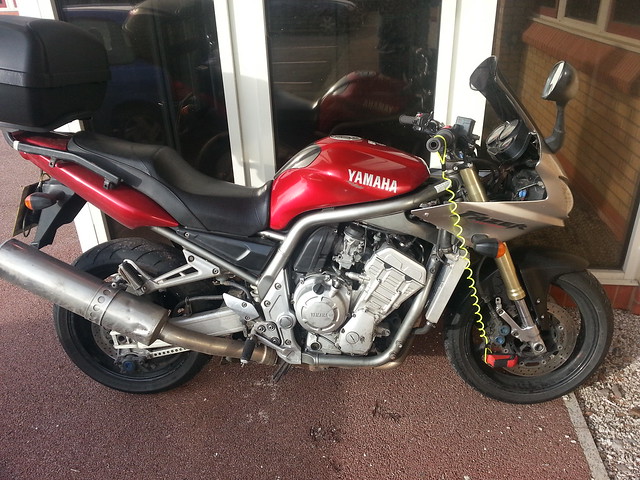 The King of Bling wrapped mudguard 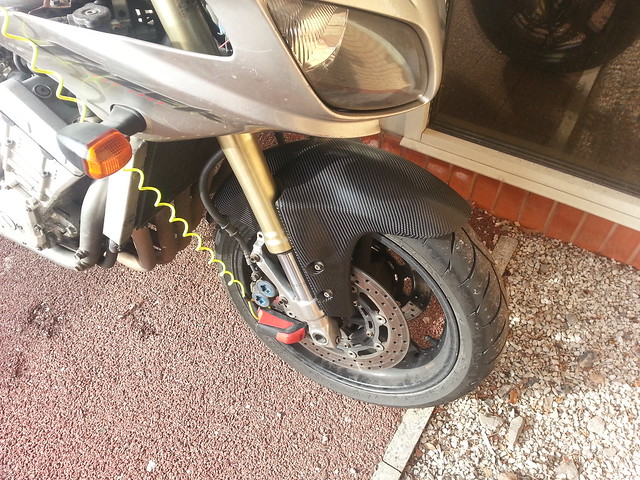 Things to complete: Need two bolts for the mudguard rear mounting points. Some sort of silencer/pipe - the damaged std one looks messy and is too quiet. Paint - or I am actually thinking of vinyl wrapping it in a Lawson FZ 750 race replica, maybe with a matt finish.
56
« on: 12 March 2014, 09:35:58 am »
Hi,
I seem to remember someone vinyl wrapping their frame with that carbon wrap. I am thinking of painting the frame but vinyl wrap might do until I get time to spray it, anyone remember who it was who did that?
I am interested in knowing how the seams looked and how well it lasted etc?
Cheers
NW
57
« on: 04 March 2014, 01:50:40 pm »
Hi, I am still on the lookout for some front fairing infills. If anyone has a spare set... It is still my intention to make molds from them to make some carbon fibre ones so once that is done I can sell them back (or sell them on). Just waiting for the weather to get a bit warmer before delving back into that
58
« on: 28 February 2014, 02:39:44 pm »
Ahoy hoy!
So, when I bought my bike I found it had a scotoiler with the Magnum HCR accessory. It was throwing oil all over the gaff and I found that it had three problems, it was turned up way too high and it had enough crud on the sprocket that it touching the nozzle, which was turned to face the sprocket, pulling the oil out pretty much constantly.
After sorting all this I found it to be great - clean wheel and nice clean lubed chain. However after not using it over xmas (2 weeks off) I have been gradually turning the flow meter up and up as its not oiling the chain. It is now back at the position it was when it was previously covering my back tyre with oil.
Is this a known issue? Anything that causes this?
I have checked the usual and it can flow oil out freely, the vacuum is ok etc. I have not laid the bike up for winter, its been in constant use and the temps are pretty much the same as they have been all the time I have been using it.
59
« on: 16 February 2014, 06:58:08 pm »
Anyone tried Dunlop Sportmax Qualifiers? My brother has a brand new set he says I can have (although unfortunately not the marchesini magnesium race wheels they are coming off...)
Wondering if they will square off rapidly. I currently have a 190 maxxis sportmaxx on the back with a metzler K2 ex race tyre on the front, both of which are coming to the end of their lifetspan.
While I am at it, the 190 rear is squashed onto the std rim which is really for 180. I do have a 190 R1 rear that I might stick on, any handling issues when doing this?
60
« on: 10 January 2014, 04:45:36 pm »
Anybody go to that?
We used to go the NEC pretty much every year but not been for probably 6 years (when it went really small). Never been to the Manchester one, is it worth it?
61
« on: 07 January 2014, 03:08:06 pm »
Does anyone else find that anything different about your kit or process screws up getting ready to ride (your bike)?
I recently started wearing earplugs when riding and the first few times I put them in I found it all a bit clumsy. Usually its jacket zipped, collar velcro down, helmet on, fastened, gloves and were off.
With the plugs it was more, zip up first? plugs in next or first? helmet, gloves? drop glove! KEYS! etc In fact once I forgot to do my helmet strap up because of it and had to pull over. Now its second nature but its odd how it can affect you. (I am saying "you" here in the vein hope its not just me)
Same thing happened with helmet on at the fuel pumps. My usual garages require helmet off to fill up and 99% of the time I use those for convenience without any bother but one near my office doesn't. When I do use that one and fill up, helmet left on, gloves off to get out wallet etc I sometimes forget to put the gloves back on and only realise when I pull the clutch in.
62
« on: 16 December 2013, 07:43:16 pm »
Was going to put this in the 1000 section but I guess it could be a general thing... I then thought of putting it in the "what have you done" thread but I think this would suit its own. As some may remember I previously mentioned making some carbon fibre parts for a gen 1 fazer 1000. I made a bit of a start yesterday, making a mould of the left hand airbox cover. The moulds are made from chop strand mat glass fibre so not really that eye catching but thought some might be interested (given it had a fair bit of interest). Also I had offers of lending peoples parts to take moulds off so this might serve as a bit of an eye opener to what happens and how the original part is affected by the process. (I need the fairing infills for my bike as I bought it as a cat c write off and they were smashed). My plan would be to make a mould to make CF versions from... Anyway, as its been a few moons since I last did anything with composites I made a mould and here is the progress. This is the part. At this stage it has been lavished with attention, washed, dried, waxed (with carnuba release wax) 3 times and buffed after curing each coat then coated with PVA release and left to dry. This is to ensure the part comes out of the mould as easily as possible and without damaging the mould surface. 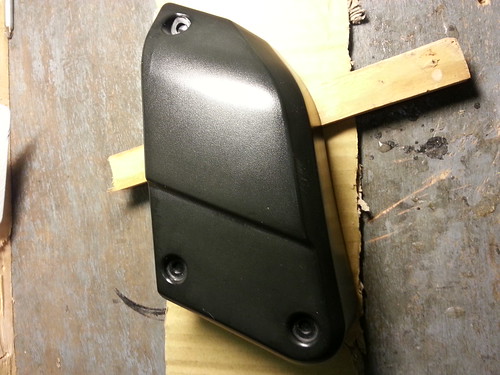 Next up I put some clear coat gel on with 3% hardner. I added a pinch of black dye to make finishing the mould easier (you can see light reflections much clearer). There is no real finesse to this really, slap it on, push it about as best as you can. Due to the release making it so slippery its a bit like painting on glass! Here it is, dyed black. You can see its black? Me too... 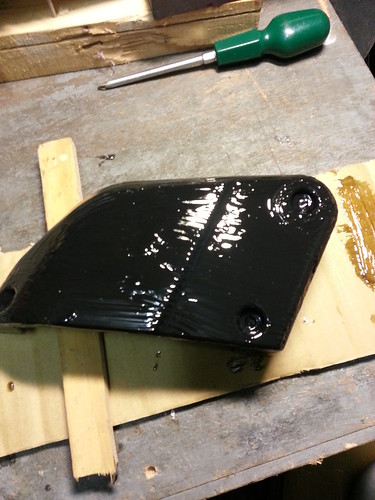 This was left to go tacky. I have an extremely specialist bit of equipment for curing. Many knowledgeable people are now nodding, "autoclave?, oven?" no, a double lined cardboard box with a hole in it. Through the hole I poke a hair-dryer, 30 seconds of "Turbo Heat" warms it nicely even in a garage at this time of year. I came to the 30 second mark after consulting Nicky Clark. He is alright that lad... This can be left for 15 mins between adding more hot air (from the hairdryer not Nicky). Once tacky Its the fun part, putting the fibreglass on (yaay). Poly resin, hardner, brush, acetone at the ready, Surgeons gloves. The heady smells... Anywho, as I said, its been a very long time since doing this stuff and although I prepared the fibreglass to lay up I failed to remember how tight you can lay it up over curves (and probably lots inbetween). This part has an almost 90 degree bend for the sides, one side also has a very short skirt, 4mm or so which made it tricky to get the glass to lay on nicely - it wanted to remain parelell to the top. With the resin curing fast and me faffing with the bold recesses making sure they are done it all got away from me. I decided to scrap this as a working mould layup and carried on purely in the interests of regaining familiarity. I had also made a bit of a faux pas with handling it, I had pulled a thumb sized piece of clearcoat off when I needed to move it when laying up one of the skirts. So I did the best I could, got rid of the air bubbles etc and didn't concern myself with the short skirt problem. By now the resin was curing enough to make it non-viable to correct. I only put 2 layers on anyway. This is the mould exterior. 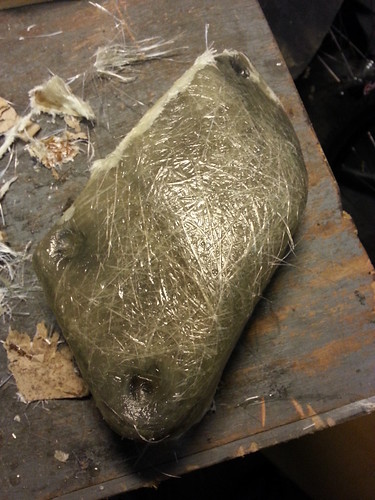 I have trimmed some of the excess from it already. So you can see, its got the shape etc. At this stage its unfinished (obviously) and if it was a working mould it would be finished with nice trimming and knocking off any stray strands etc to make handling less dangerous. Popping the part out of the mould made me a bit sad. It was nigh on perfect!! I was a little rough pulling it out as I was not trying to maintain any nice surfaces on it due to the prefix that I was scrapping it but yeah, this yielded a very useable mould. Here it is  There are a couple of dry strands fallen in after cleaning it, these can literally be blown out, the part is hard and very accurate, you can even see the markings around the bolt holes left by the bolts. This has the textured surface of the standard part, I was toying with the idea of having two sets of moulds, one with the texture and the other with the glassy smooth surface of contemporary CF parts. This mould would have been sanded glassy smooth with 1200 grit paper and G3 rubbing compound. Still, all is not lost, it was a good refresher exercise and I now recall enough to make the next mould a workable and accurate one. As a matter of interest, this is the part after pulling out of the mould, its as is, I have not cleaned anything off it. You can see that it is unmarked and can be refitted in perfect condition (well, as perfect as it was before). The mould making doesn't affect it in any way. The shiney bits on it are simply bits of release/resin left behind. 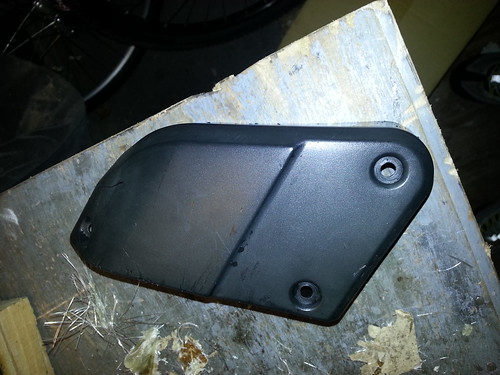 So yeah, all in all although it didn't result in a working mould it was a brilliant and useful thing to get through. Not sure when I will get to making the next mould, I will probably do both sides at the same time now I am confident with the materials again. I have to pick my time to work as my garage is attached to the house and the chemicals are a bit pongy...
64
« on: 12 December 2013, 10:37:09 am »
Hi,
When I got my bike it only had one key and its pretty worn. The ignition switching on is a bit of a faff sometimes requiring a bit of a key jiggle to get it to turn. Using the steering lock is a bit of a no-go, I used it once at work and it took 5 mins of jiggling/twisting/swearing to unlock it (locking it is smooth as silk though...).
I have blasted it with WD40 etc but it didn't really improve (although I didn't blast it for long...). I heard that worn keys can cause this as well, seeing as mine is fairly worn out I was going to get a new one cut.
Can you get the key code from the bike? I believe that a key cut from mine will simply replicate the worn profile and to do it properly requires the key code.
65
« on: 04 December 2013, 03:37:40 pm »
When Jack Frost arrives in earnest and I am no longer willing to risk riding on ice I will be fitting some R1 forks I got off eBay to my bike.
I will therefore have a set of straight standard forks available. They look to be in good nick, the adjusters are fine, no scratches, no leaks. The mudguard will be with them too (Red) which is in good nick save for a small mark. If people are interested I will put some pics up post removal.
If anyone finds they need some give me a shout with an offer.
66
« on: 26 November 2013, 01:47:44 pm »
Previously I only really used my bike (blade) for fair weather jollies however since recently getting the Fazer 1000 I have found even riding in wet/cold is pretty enjoyable. I have therefore found that I am using it daily for the 90 mile commute to work which involves a long stretch on the M6.
Although I have lots of experience riding bikes I am not really that used to filtering the rush hour traffic so I tend to only filter if traffic is going less than 40 and if its stationary I will only go around 20/25mph between lanes.
On my commute a guy passes me nearly every day and he does this because he seems to "filter" regardless of speed. For example I was filtering 25 mph through barely moving 2nd/3rd lanes then it set off so at 40mph I went inline in the 3rd lane. This guy just zipped on between the lanes, must be doing around 60 - 65mph. He does that until he is out of sight! I tried to follow him once but just didn't feel secure doing that so dropped back... If its stationary traffic he does go slower and doesn't look dangerous.
I am comfortable riding at my speed but was wondering if its usual to filter in that way, seems like a recipe for disaster.
67
« on: 21 November 2013, 07:27:36 pm »
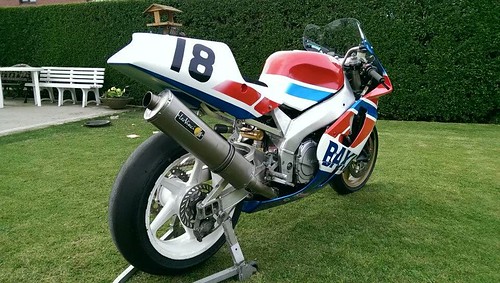
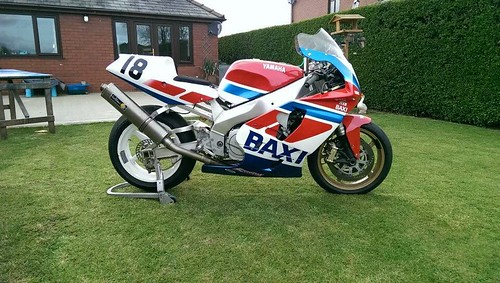
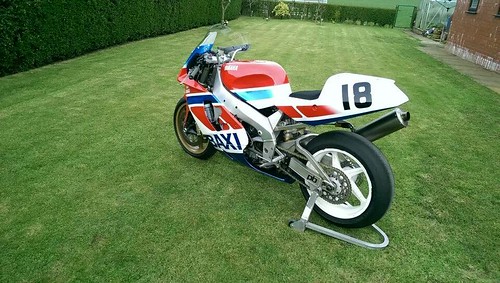
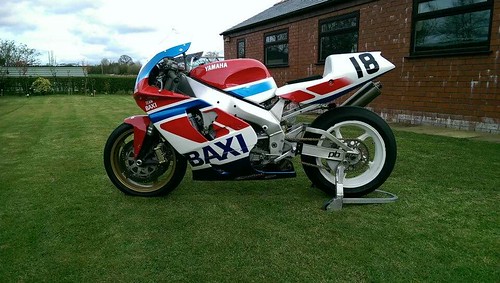
Offered up the frontend to a bike I am building for my daughters 2nd xmas! Its a TZ750 Balance Bike made of wood (predominantly self-laminated ply). Forks are made from broom handles, an Ohlins one naturally.... Just got the handle bars to make (these will be alloy), seat (from foam) and the number plates which will either by more ply or I might laminate some Carbon Fibre ones, its been a while since I have done any CF and I think I will be making some fairing panels for the Fazer soon so this should blow off some cobwebs. Paint went on quite well! Forks/Triple clamps will be silver. 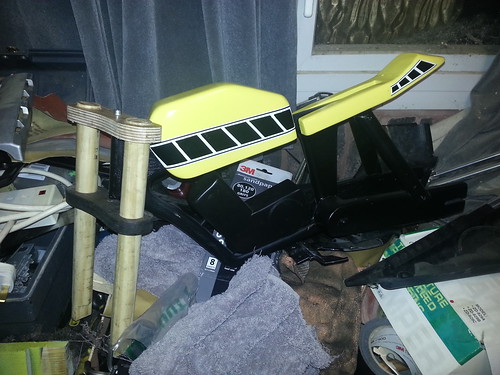
68
« on: 15 November 2013, 10:26:39 am »
Hi,
My bike came fitted with a scotoiler (one of the ones that goes behind the number plate - touring?) The bike was a Cat C write off and I got it roadworthy over a weekend, all good. The rear wheel and pretty much the entire chain side of the under side rear of the bike (including sprocket and rim) were covered in thick tar like cocktail of grease/oil and dirt. It really was quite impressive sitting at minimum 2mm + all over.
Anyway, the bike came taxed and MOT'd and I insured it just in case of theft really as I was not planning on using it yet, I used it this week to come to work on due to major problems on the M6. I took the bike out unwashed etc as I had simply dry fit everything to check I had all fasteners and bits and bobs before stripping it back and starting the cleaning/painting.
Parked up at work and I noticed oil on the chain side of the back tyre again -it reaches about an inch in (where the chicken strip would be). I assumed it was centrifugal force spinning the grime off the wheel so I cleaned all that off, spick and span. I noticed this morning that oil was still on the tyre and the rim was, again, filthy.
I have no experience with Scotoilers and don't know anyone who has, I am contemplating removing it completely to avoid the problem. When correctly adjusted do they give off any "fling"? I am used to simply oiling chains every now and then and they do have a bit of fling but nothing like this oiler.
I have turned the oiler down to its minimum setting after reading the online manual at work. It seems to have been set to the max setting in the range - not set to prime) (the adjuster is limited min/max by two pipes - is this correct?)
Cheers,
NW
69
« on: 04 November 2013, 05:29:16 pm »
Hi All,
Got my first Fazer (first Yamaha really...) gen 1 1000. Currently in the process of doing it up (it was a crash damaged one - fairing/headlights, no mechanical damage).
Winging its way to me are R1 forks, s1000RR shock, Renthal 758's (plus crossbar), an all alloy race radiator (my old man is making that), brand new R1 mudguard from China (cheaper than a second hand one ...).
Looking forward to getting out on it! Wanted something less focussed than my Fireblade and the Fazer seems to fit the bill, its certainly comfy to sit on!
Removing the seat I see there is a toolkit and (on mine) a standard rubber bungie with nothing under it (near the fuel tank), what is supposed to be in there?
70
« on: 04 November 2013, 05:24:49 pm »
Hi,
Anybody have any gen 1 grab rails for a 1000?
Mine came with a full top box + rails (on eBay at the mo) which I have removed but now left with 4 nice square holes in the seat.
Need some grab rails, any colour really.
Cheers,
NW
71
« on: 30 October 2013, 11:47:16 am »
Hi,
I am after a nose cone and headlights for a 2001 Fazer 1000. The colour is not particulaly important as I will be spraying it anyway.
I have seen a few nose cones on eBay but coming up short with the headlights...
Cheers,
NW
|